
Contents
Introduction
This section supposes that you have read the previous one: 'Creating a simple workflow'. We will cover tasks chaining by creating a workflow containing two tasks.
The workflow will create a directory, then a file in this directory by using the 'mkdir' and 'touch' commands. The names of the directory and file will be passed as parameters to the instance.
You can download the result here : mkdirtouch.xml.
Create the workflow
Create a new workflow, and edit its settings ( icon).
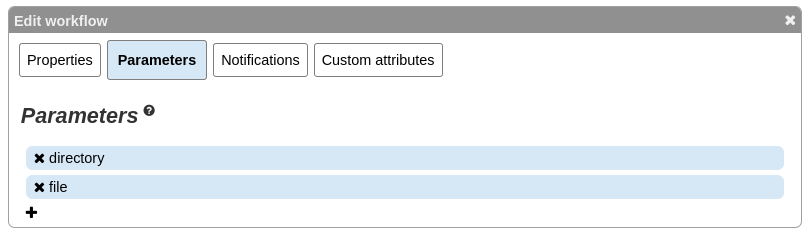
We've named the workflow 'mkdirtouch'. This time we need 2 parameters, let's name them 'directory' and 'file'.
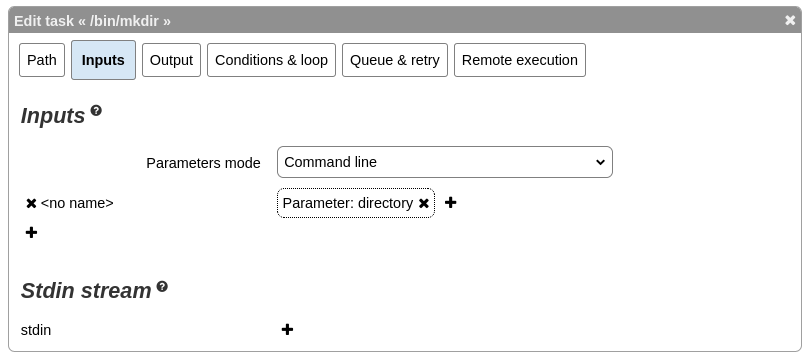
Create a new task and edit it. First step is to create the directory as we were told. Set the path of the task to /bin/mkdir and go to the input section.
Add an input, type 'XPath' and choose the workflow parameter named 'directory'. This time you have 2 choices! You should get something like this:
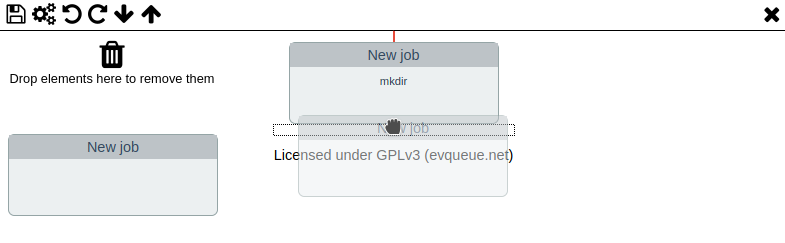
Close the dialog and create a new job ( icon).
Drag & drop a it right under the first Job to create a new Job containing the second task.
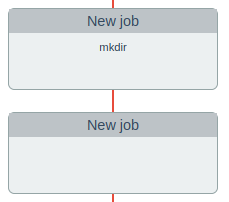
You should get a 2 jobs workflow like this:
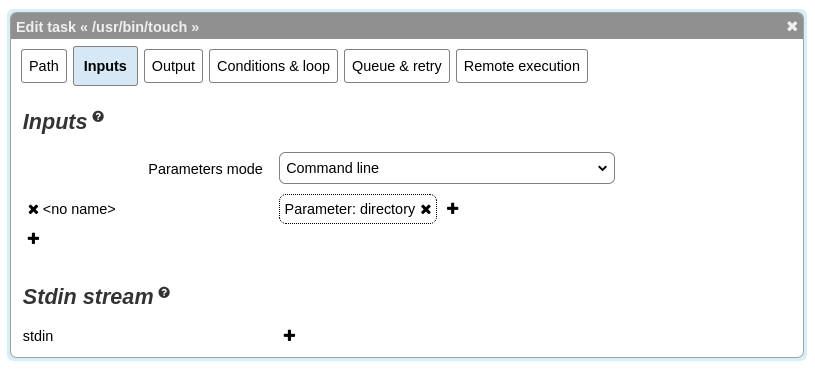
Create a task in the second job and edit it. Change its path to '/usr/bin/touch'. Then go to the inputs tab.
This time will be slightly more complicated. We want to create a dynamic input by concatenating several parts: the directory, a '/' and the file name. Thus we will touch a file into the directory.
Add a new input, then click on the add input part ( icon). In the 'XPath value' tab, choose the directory parameter of the workflow. Here you can see that you now have more choices as you can also use your parent's task output.
You should get this:
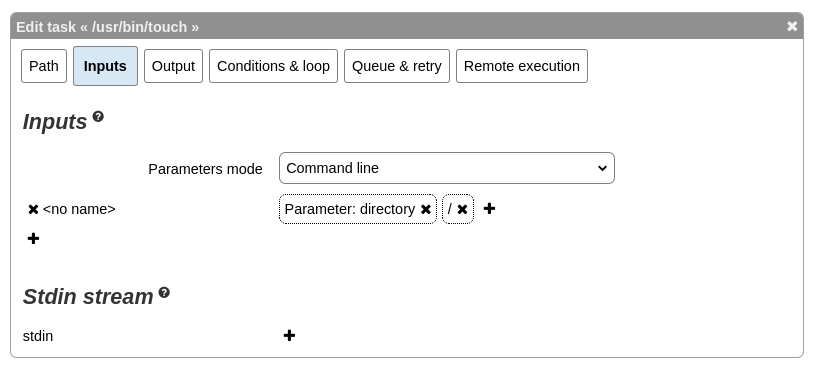
Add a new input part. This time go to 'Simple text' tab and simply type '/'. You now have this:
The last part of our input is the file name. Add a last input part, type 'XPath' and select the 'file' parameter of the workflow. You now have the full input:
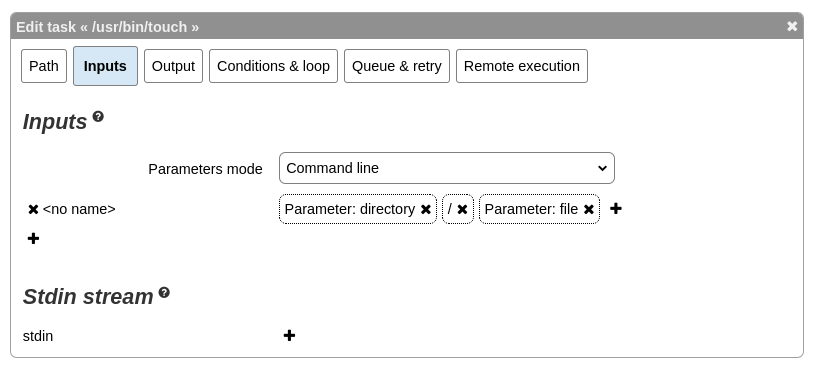
We now have an argument that is the concatenation of the directory, the litteral '/' and the filename.
You're done for the workflow creation. Exit the editor saving your changes and go the the instance status page.
Launch the instance
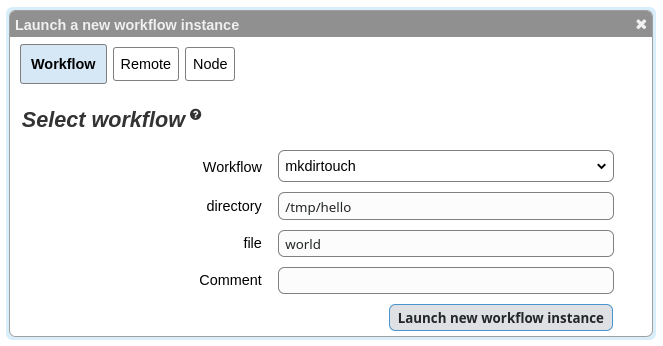
Launch the instance with the rocket ( icon). This time you'll be asked for 2 parameters. Enter a directory and a file.
Open the instance details to see if everything went well. You should have something like this:
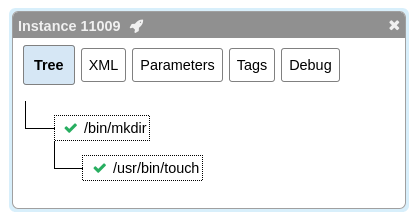
If you click on the second task (touch) you can see the dynamically computed input. In our case, this is '/tmp/hello/world'. You can now check that you have a file named '/tmp/hello/world' on the machine evQueue runs on.
Relaunching the instance
Now that we know the workflow works well (we have one instance ok), we might want to launch it a second time. evQueue has a special fonctionality for this. Open the details of your last instance and click on the rocket ( icon) in the title bar. This will open the launch dialog, but as you can see, all the values are already filled in. Launch the instance and check the result.
As you might have guessed, this time the result is not so good. The instance is red and has errors.
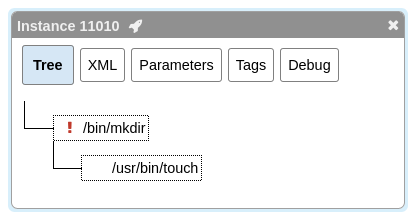
Open the failed task and check its stderr output. You can see that it failed because the directory already existed. Note that the next task hasn't been launched due to this error. This is a base principle in evQueue: child tasks nevers get launched if parents have errors.
You can try launching new instances with different parameters that should work (or not).