Contents
Introduction
In this section we'll cover some simple cases: how to create a basic workflow and launch it.
You can download the two versions of the workflow that will be created here : ls.xml and ls2.xml. These XML can be used to import the workflows by using icon in the workflow edition screen.
Creating your first workflow
Let's start with the most simple case: launching a task. We will use the well known 'ls' command and display what's in the root directory. So in this basic example, we'll create a workflow made of only one task.
In the web interface, go to the menu Settings -> Workflows. In the workflow list, which is probably empty, click 'Create new workflow' ( icon). You are now in the workflow creation UI.

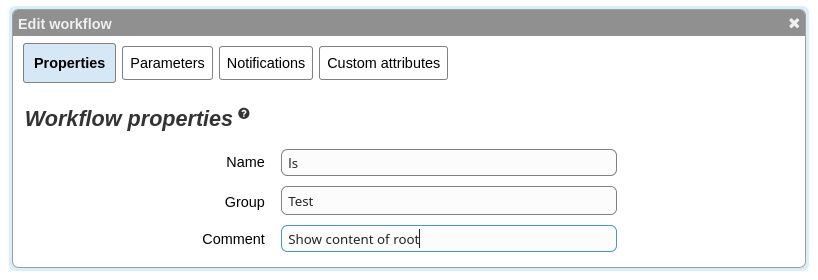
Set your new workflow name. You can also specify a group, which is used to organize your workflows in the interface, and a comment.
You can now close this dialog.
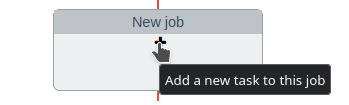
The empty rectangle you can see is an empty job, it does nothing. Hover it and click icon to add a new task into this job.
Click on the "empty task" and type the following in "Path" field :
As you can see, there are lots of tabs and parameters, but for now we'll ignore all of this and simply change the task path.

You can now close the dialog, your first workflow is created. Click icon to save your changes (or use CTRL + S) and exit this screen using icon.
Executing the workflow
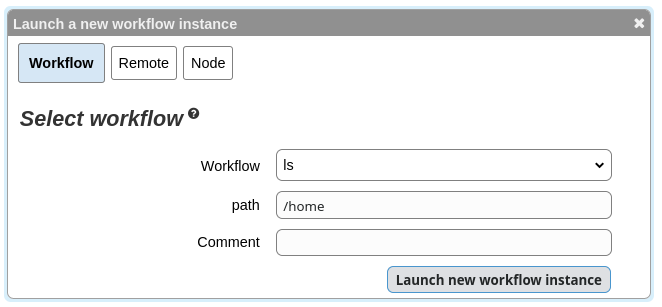
Now that you have created your workflow, you probably want to launch it to see what happens. In evQueue, this is called lanching an instance of the workflow. Go to the menu System state -> Workflow instances.

Click the rocket ( icon) and select your workflow. If you have set a group up, you'll see the group in the list. This is useful for organizing your workflows when you have lots of them. Last but not least, click 'Launch new instance', this will close the dialog.
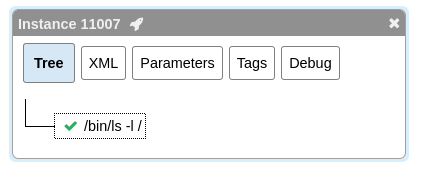
If everything went well, you should see your instance in the 'Terminated workflows'. It should also have a green tick, stating that the task terminated correctly.
Click on the instance to see the details.
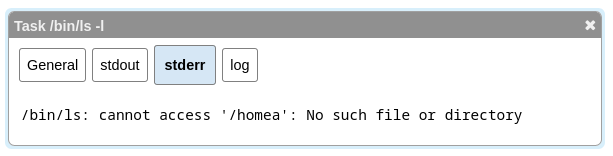
Click on the ls task to see its execution, then go to the 'stdout' tab. You can see the result of the ls command.
It's done, you have created and launched your first workflow!
Using workflow parameters
Well, this is very interesting, but I can only list the content of one folder that is hardcoded in my workflow. How can I do something more dynamic?
Here we come to workflow parameters. When you launch an instance, you can pass parameters to it. These parameters can then be used by tasks to do more dynamic things.
Go the the workflow parameters and edit your workflow by clicking the 'Edit workflow' icon in the 'Actions' box right next to its name.

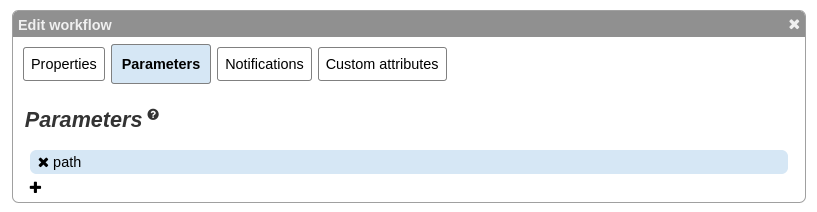
Once again, you're in the workflow edition screen. Edit the workflow properties ( icon), go to the parameters Tab and add a new parameter named 'path'.
Exit the dialog and edit the 'ls' task. We will now use dynamic workflow parameter for our task.
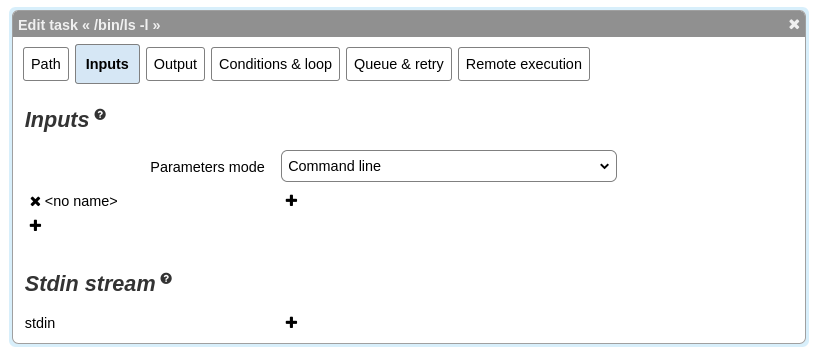
Edit the task path and remove the hardcoded '/' at the end. Then go to the input tab. Here, it's possible to configure dynamic inputs that will be appended to the task path.
Add a new input. The name have importance only for you, so you can put whatever you want (or leave empty). You should end with something like this :
Click 'Add input part' at the right of your new input ( icon) and go to the 'XPath tab'.
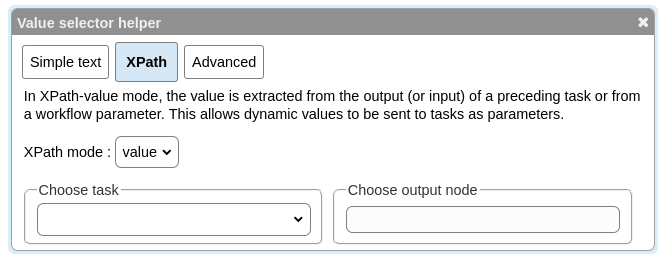
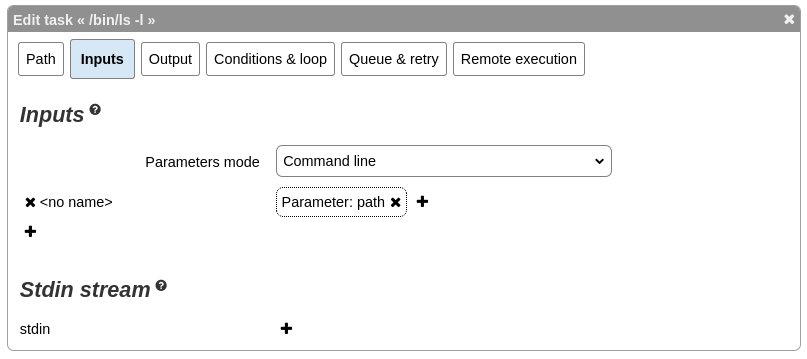
In the choose task section, choose "Parameter: path". Anyway, this is your only choice for the moment as our workflow only takes one parameter! Close the dialog. You should have the result below.
You can now close the dialog and exit the workflow edition. Once again don't forget to save your changes.
You can now create a new workflow instance. This time you can see that you're asked for an additional parameter named 'path'. Enter some value and launch the instance.
In the terminated instance, you can now see the content of the directory you have set. If you provide an invalid directory, you'll see that the instance will end in error (with a red exclamation mark). You can see the error in question in the stdout tab of the task.